How to Set Up Your Chatbotic AI Assistant
Setting up your Chatbotic AI assistant is a quick and easy process that can be completed in just a few steps. This guide will walk you through each step to ensure a smooth setup experience for your new AI assistant.
Step 1: Adding Your Company Name
After signing up for one of our subscription options, you'll be prompted to enter your company name. It's essential to double-check the spelling and capitalization as this information cannot be changed later on.

Step 2: Training Your Assistant
To provide accurate responses, it's crucial to train your Chatbotic AI assistant with up-to-date information. You can upload both URLs and documents for your assistant to learn from. Here's how:
- Upload your company URL: This process may take a few seconds to a few minutes, depending on the size of your company. Please remain on the page until the upload is complete.


- Upload documents: You can upload text files (txt), Word documents (docx), or PDFs. These documents can include your internal knowledge base, FAQs, or any other relevant information you want your assistant to be knowledgeable about.
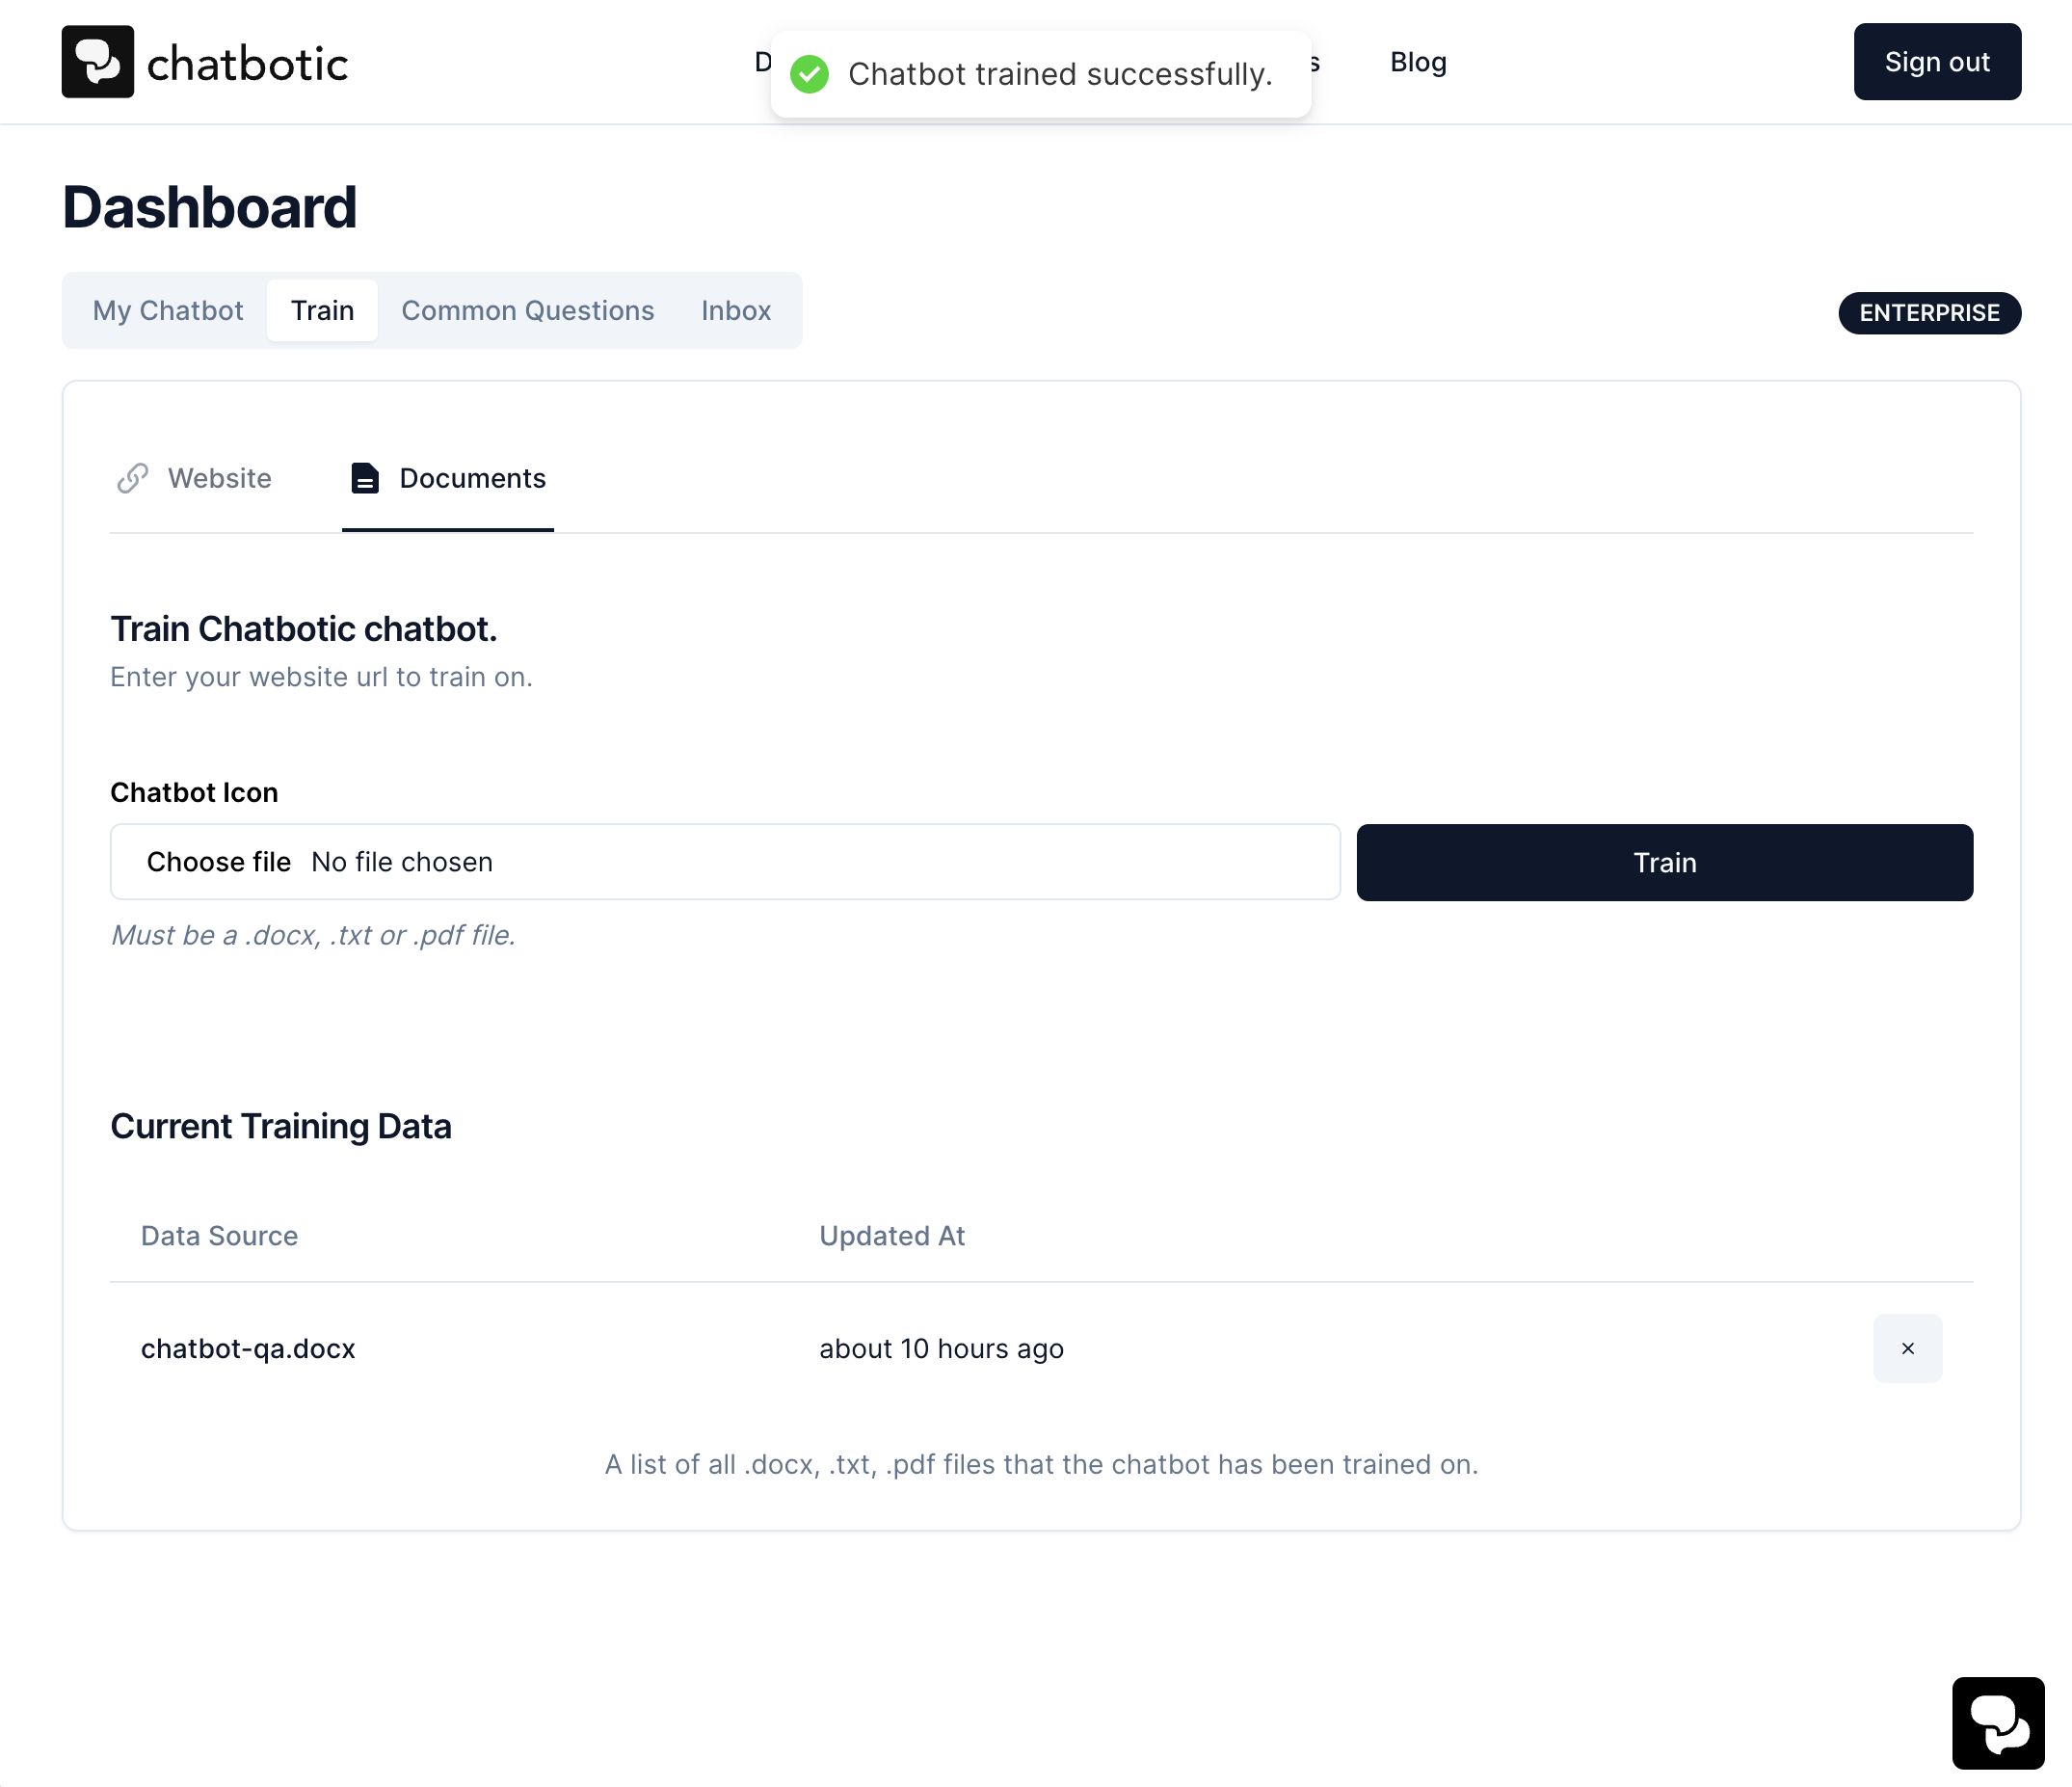
Once you have uploaded all the necessary information, submit it and proceed to the "My Chatbot" section of the dashboard to customize your assistant to align with your brand.
Step 3: Customizing Your Assistant
On the "My Chatbot" page, you'll find your Chatbotic AI assistant ready for testing and use. Congratulations! You have two deployment options:
- Deploy the chatbot using the provided link.
- Embed the chatbot on your website using the Script Tag.
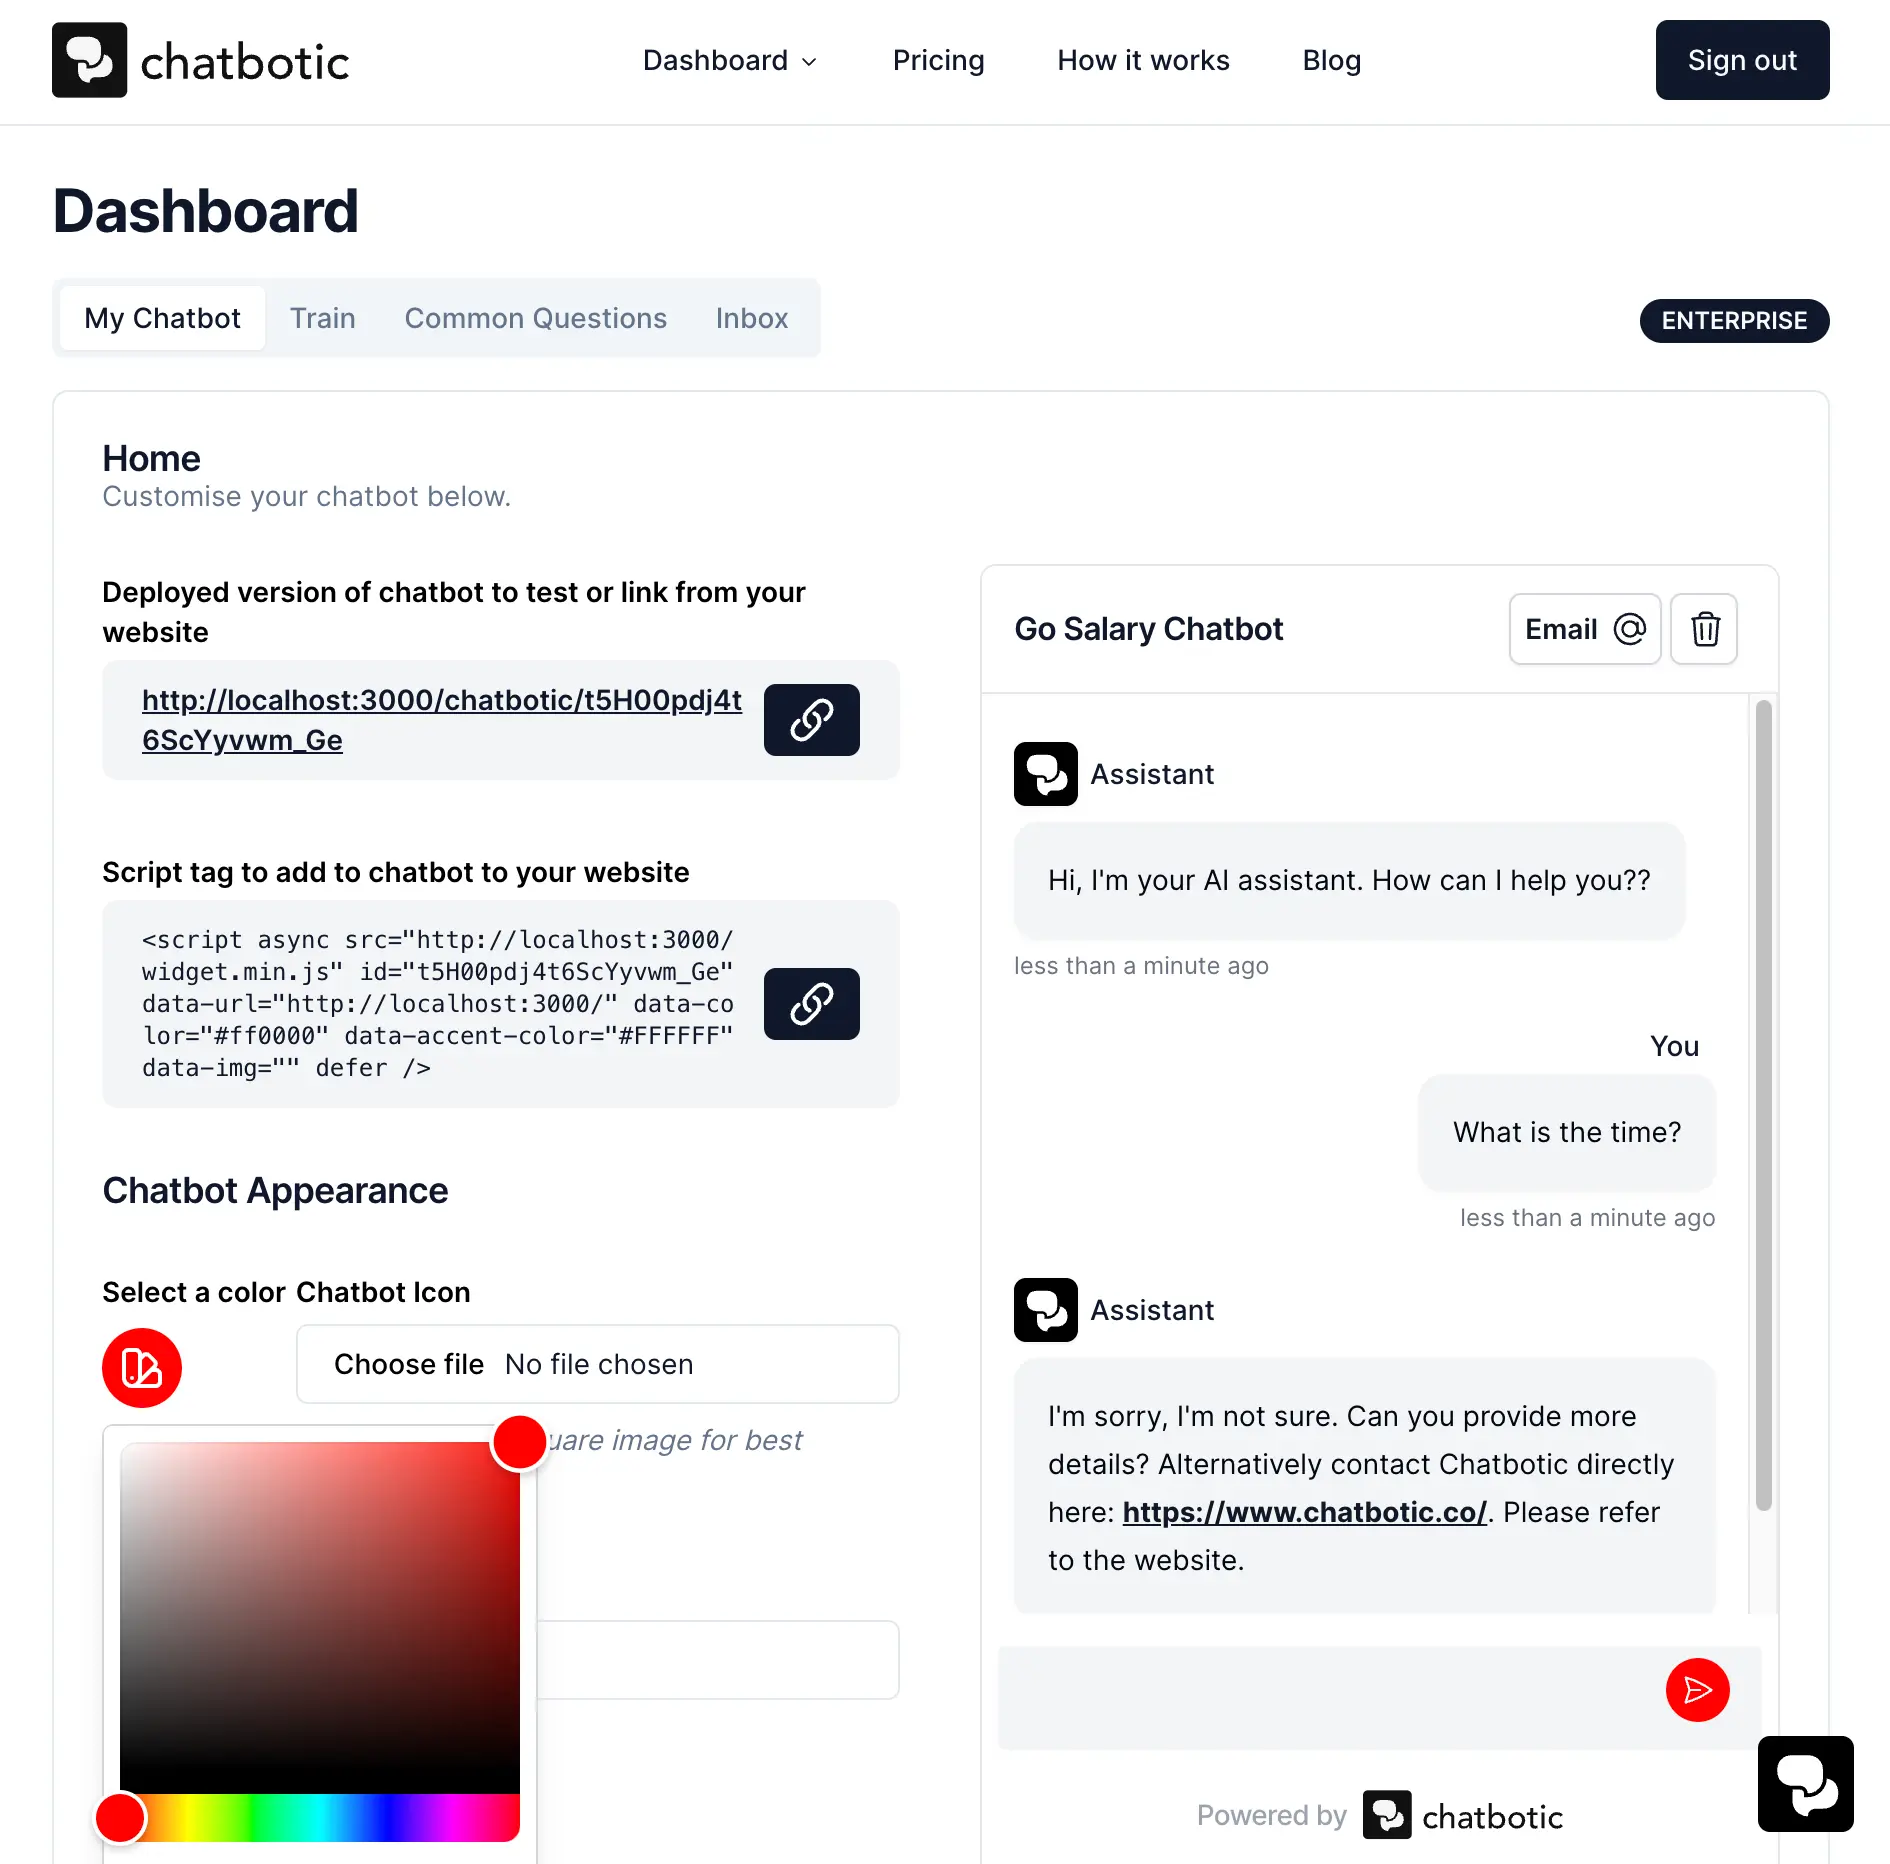
To customize your assistant:
-
Change your assistant's name, color scheme, and logo to match your company's branding.
-
Enable email functionality: By checking the corresponding checkbox, you can allow customers to send custom emails directly to your team.
-
Customize chatbot messages: You can modify the default text used in chatbot messages, with a character limit of 250.

Additionally, in the "Common Questions" section of your dashboard, you can add frequently asked questions and their corresponding answers. Adding up to 5 common questions simplifies the customer experience by providing quick answers.
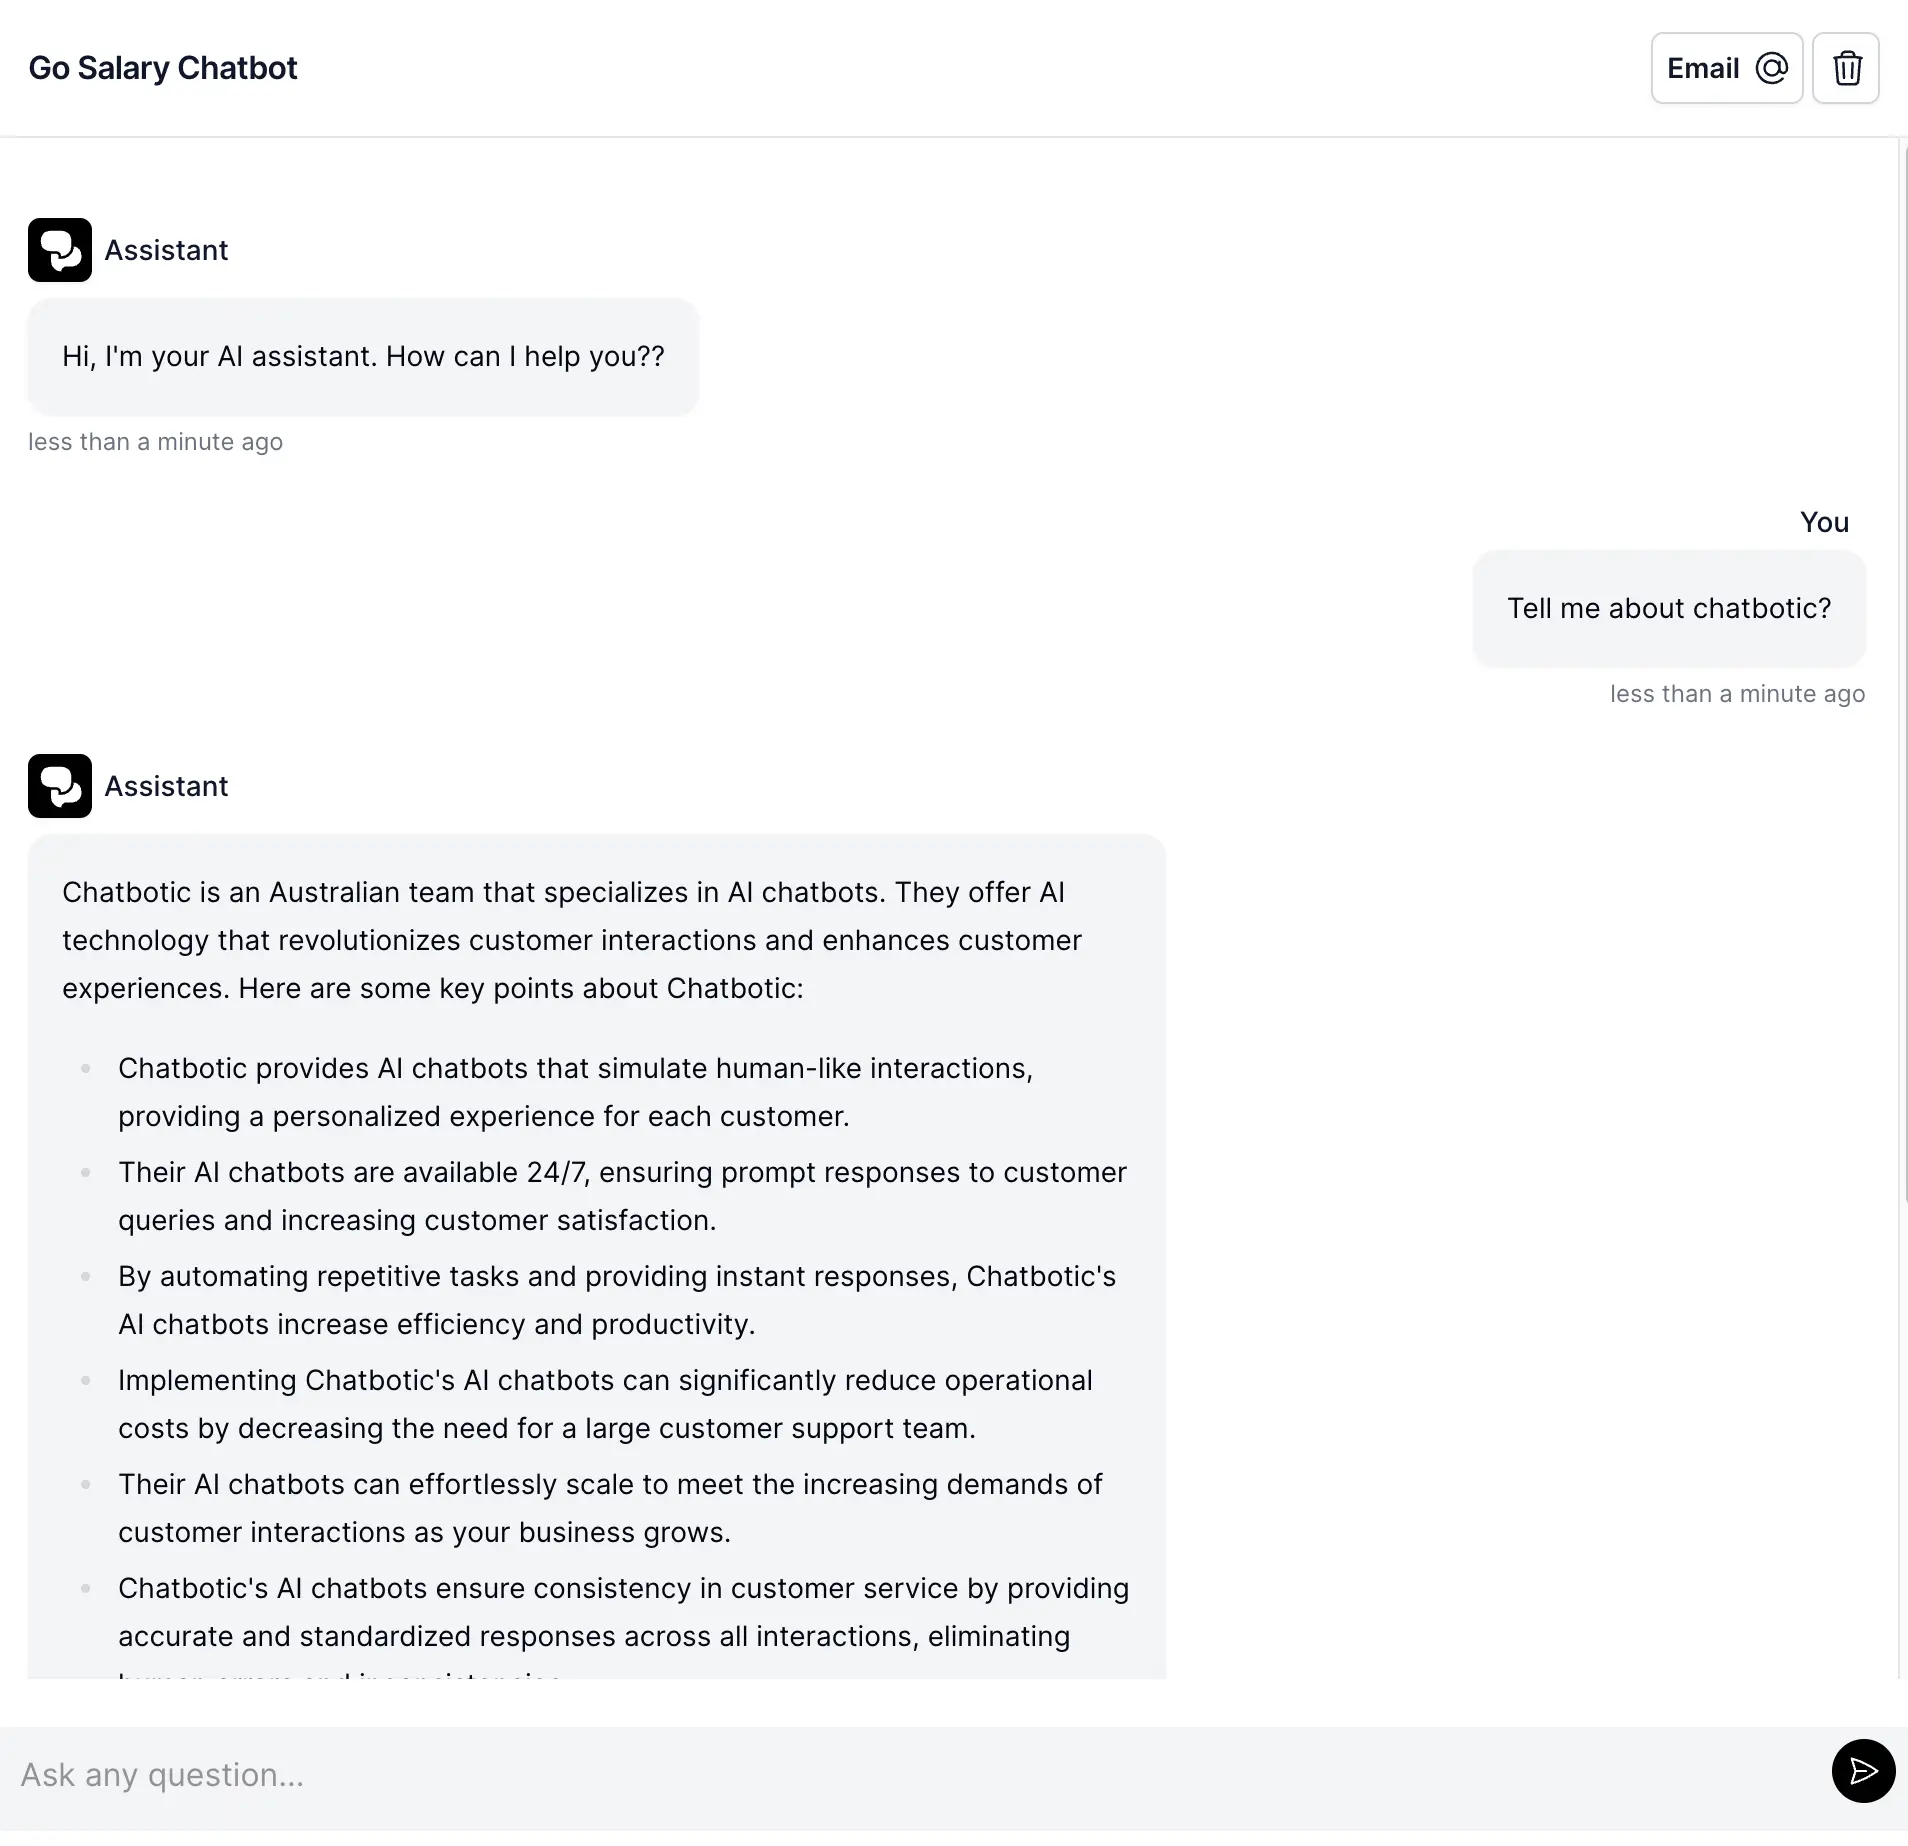
Step 4: Testing Your Assistant
Before deploying the chatbot on your company website, it's advisable to test it with trusted staff members. This allows you to identify any knowledge gaps, train your staff on the customer experience, and ensure your comfort with the chatbot's performance.
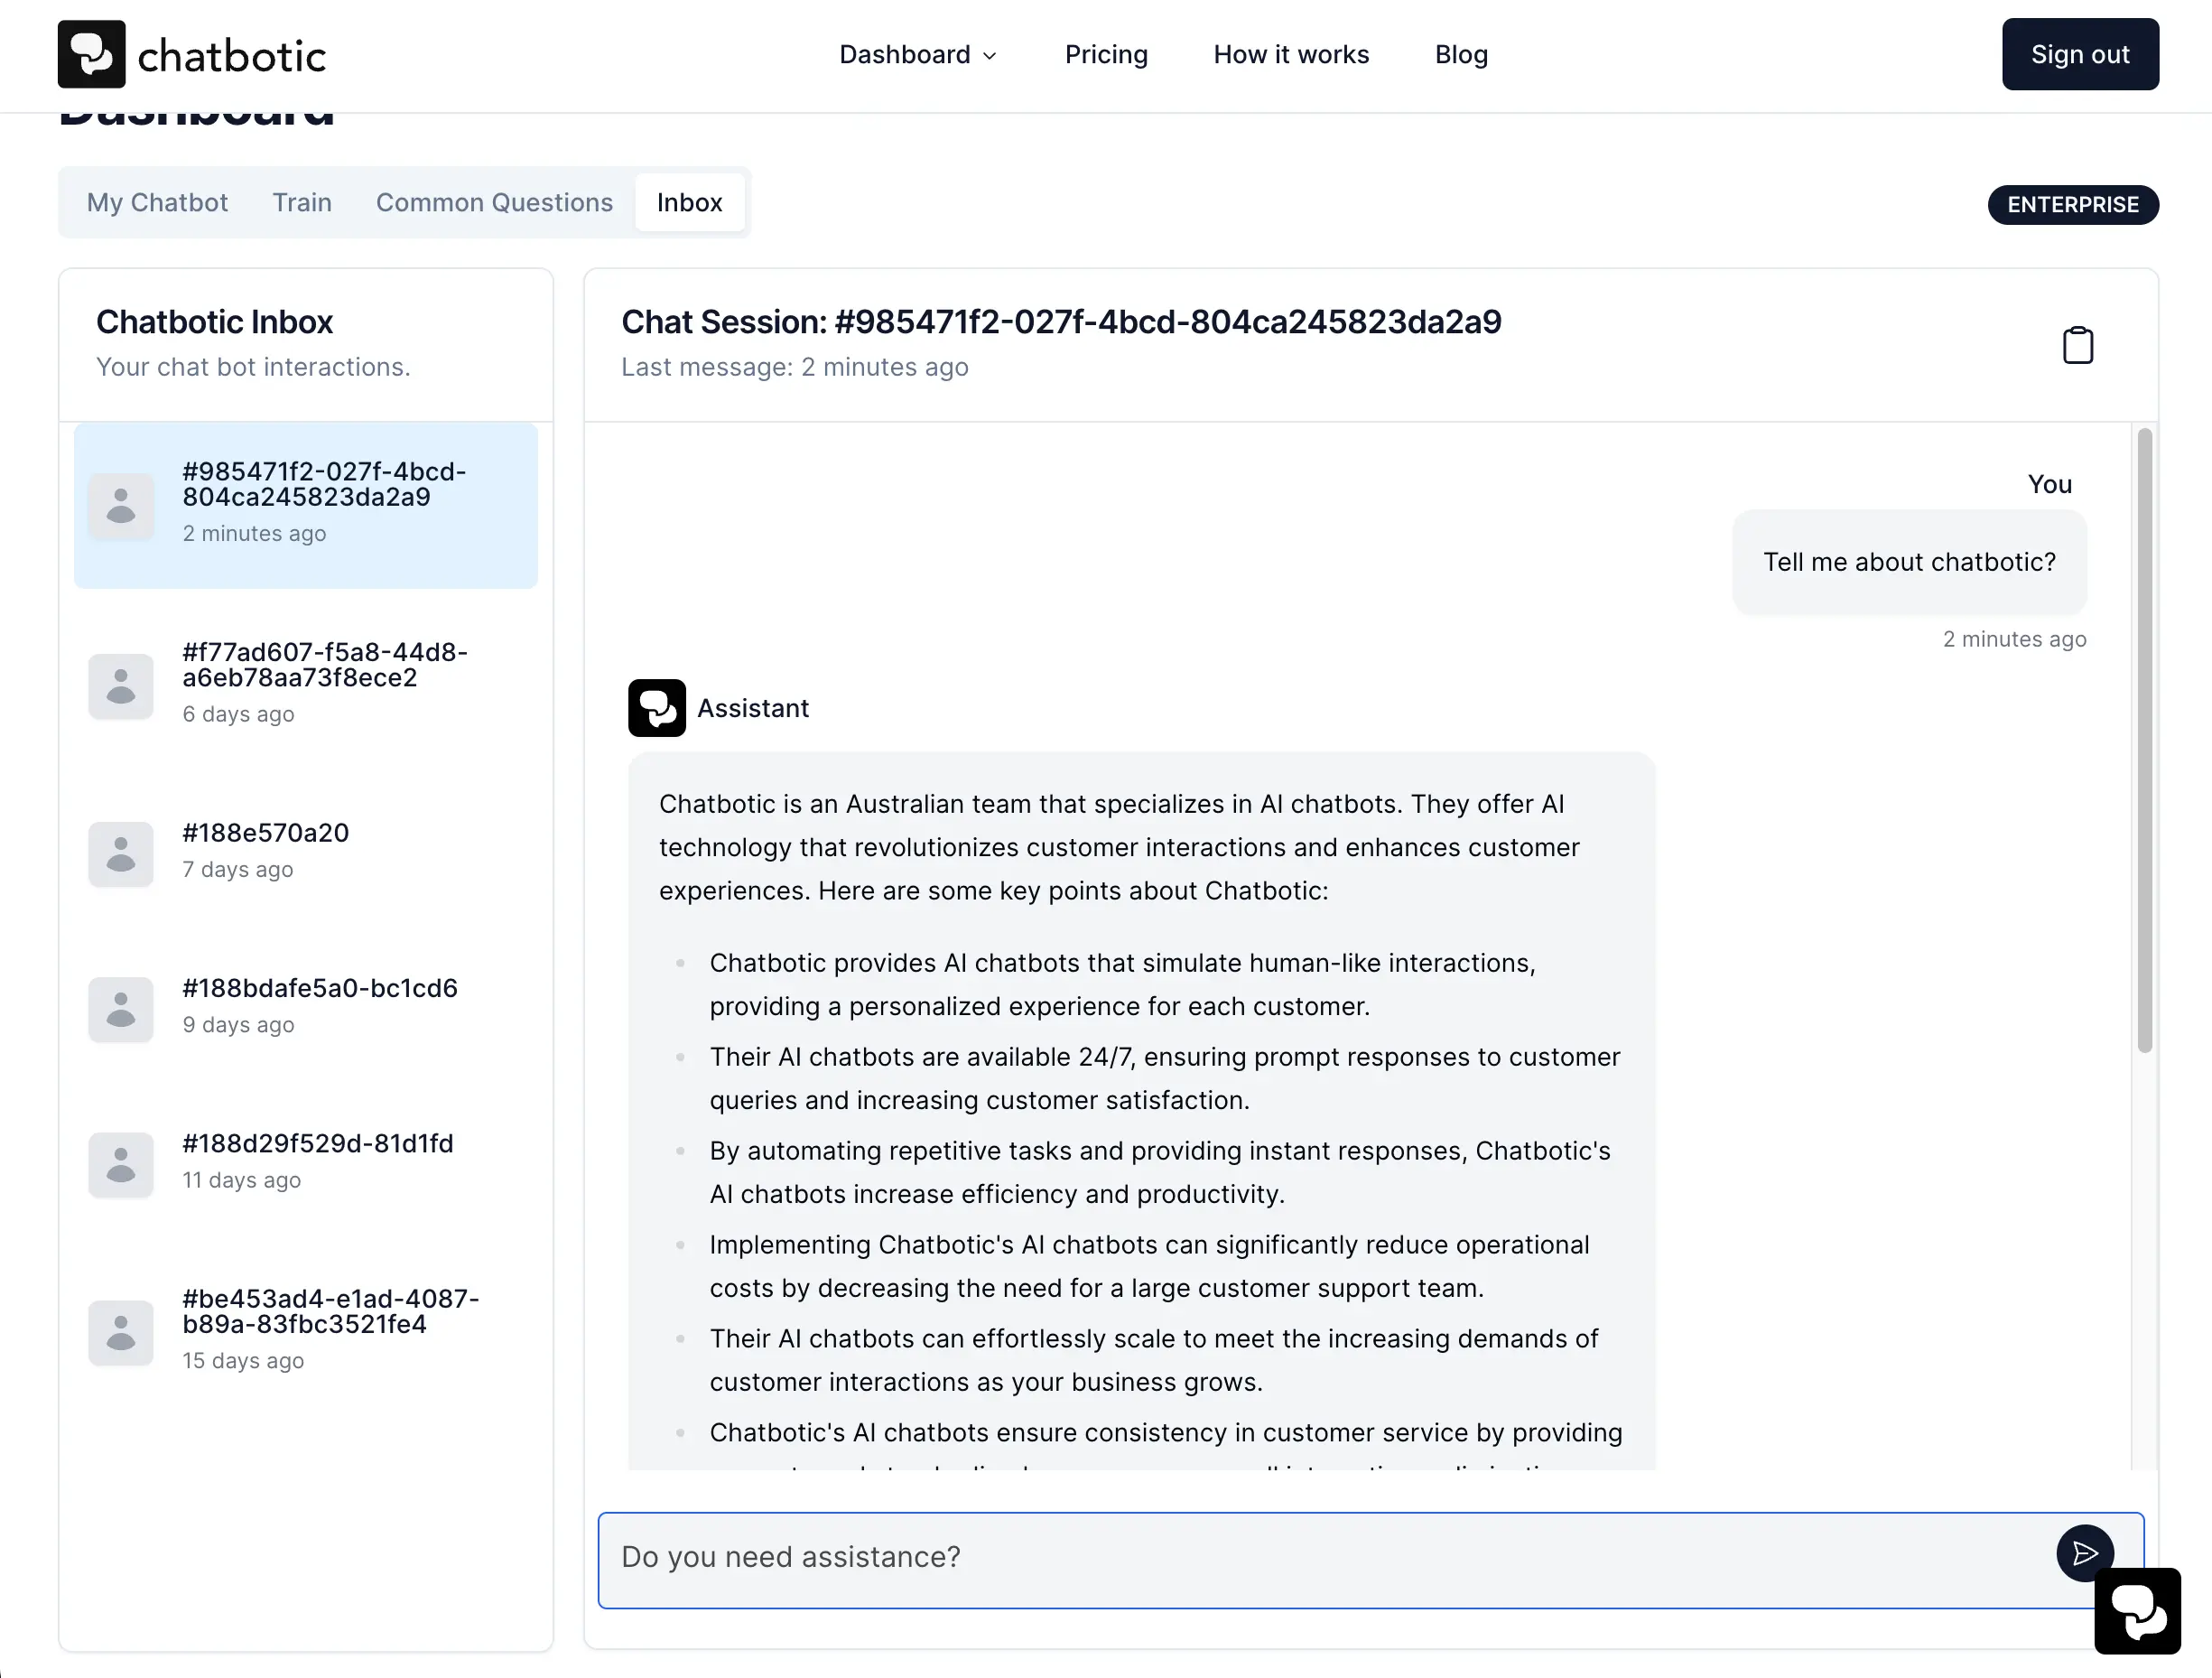
Use the Inbox feature to review answers, manage conversations, and even respond as a human. The inbox updates in real-time, enabling you to actively engage in conversations when necessary.
Step 5: Managing Your Assistant Once Live
Once your AI assistant is live, it requires minimal maintenance. However, there are a few recommendations to keep in mind:
-
After updating your website or knowledge base documents, remember to retrain your Chatbotic Assistant. Submit the updated documents and URLs, and run a quick test question to verify that the information has been incorporated.
-
Keep track of document updates: The dashboard provides information on when documents were last updated, ensuring you stay on top of changes and allowing you to incorporate this step into your team's internal processes.
-
Utilize common questions: Use this feature to guide customers toward new features and special updates. Common questions are easily customizable and can be added or deleted with ease. Refreshing the chatbot with the updated questions takes only a minute.
We hope this comprehensive guide has made setting up your AI Assistant a breeze. For additional best practices and support, if you haven't found the answers from our AI